As soon as we got proper pictures of this set, I knew I wanted it … and as soon as it became available, I ordered it (in the process getting some money off and a free Atlantis set).
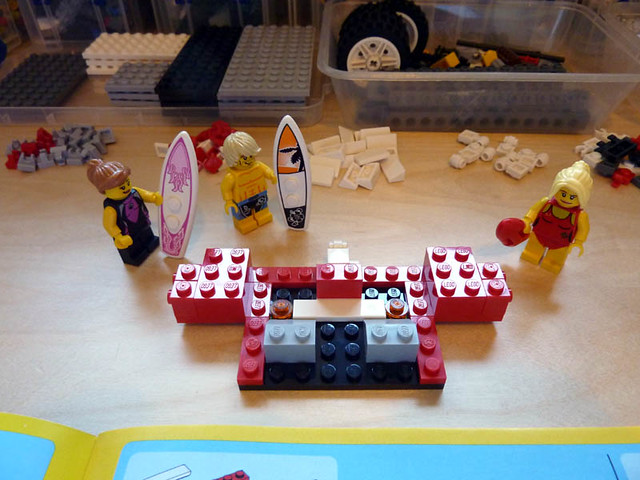
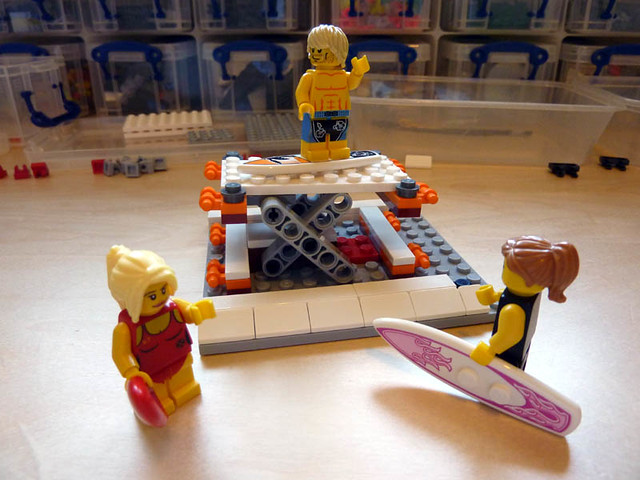
This review is brought to you with the assistance of “cool” surfers Brad and Deborah … with Sally the Lifeguard on hand to ensure safety 
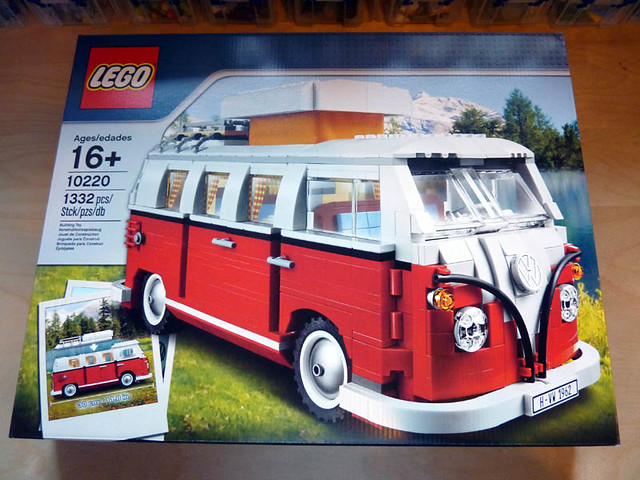
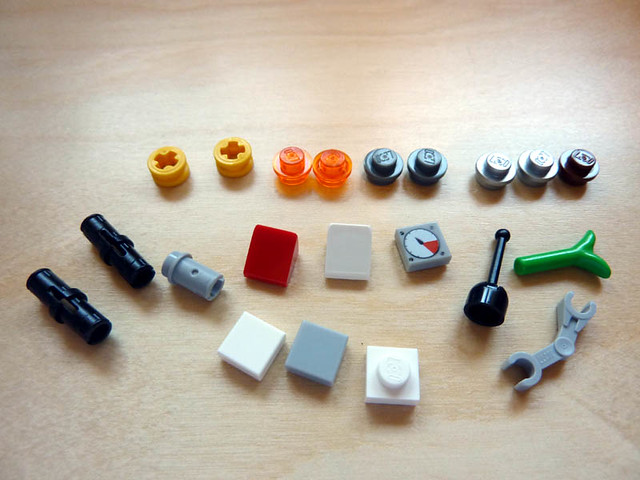
First up … the obligatory box art shots and parts in bags and stuff :
VM Camper 01 by bigospedros, on Flickr
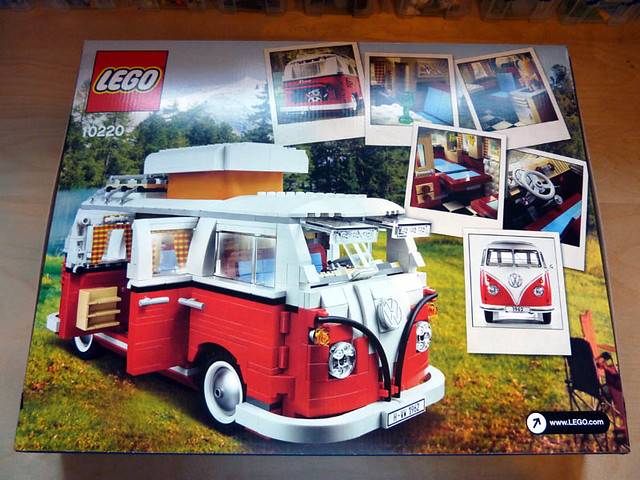
VM Camper 02 by bigospedros, on Flickr
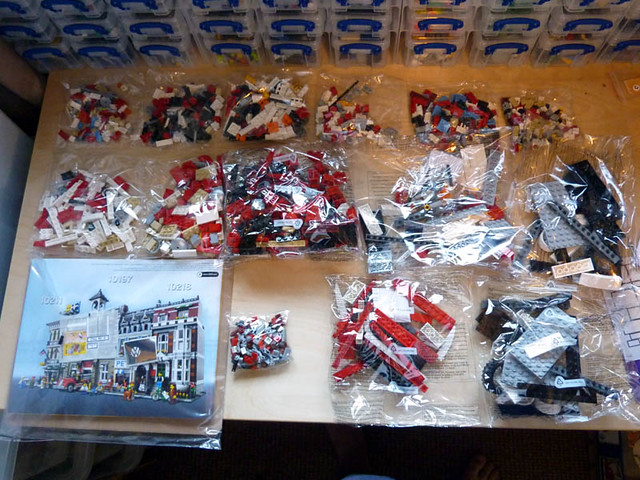
VM Camper 03 by bigospedros, on Flickr
I was very glad to see that the instructions and stickers were housed in a bag with card backing. No more mangled instructions & stickers for me! (at least not in this set)
No numbered bags though, so, it was off to the sorting I went … using old advent calendar trays as a handy sorting tool …
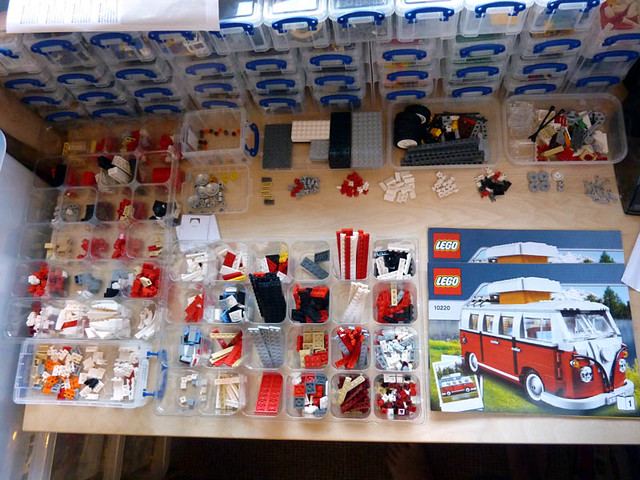
VM Camper 04 by bigospedros, on Flickr
And now onto the build …
VM Camper 05 by bigospedros, on Flickr
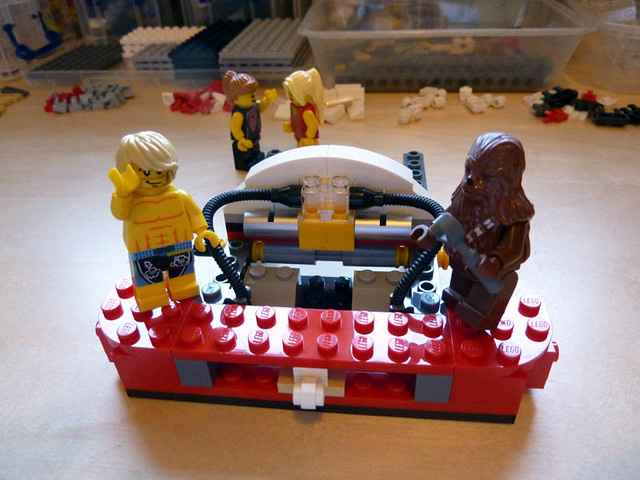
Brad, Deborah and Sally look on … clearly just supervising at this stage … you start with the back end and since this includes the engine, Brad took over … being the man, whilst the girls gossiped in the background.
VM Camper 06 by bigospedros, on Flickr
At this point, noticing the similarity to the Falcons’ hyperdrive, Chewie turned up to lend a hand!

VM Camper 07 by bigospedros, on Flickr
As a short aside, here’s a close up of the instructions … which had a nice glint on the studs that were the shiny kind. A nice feature I’d not seen before in any previous instructions …
Once complete … the engine looks pretty good. So much so, Brad got the approval of Fernando … the local race car driver
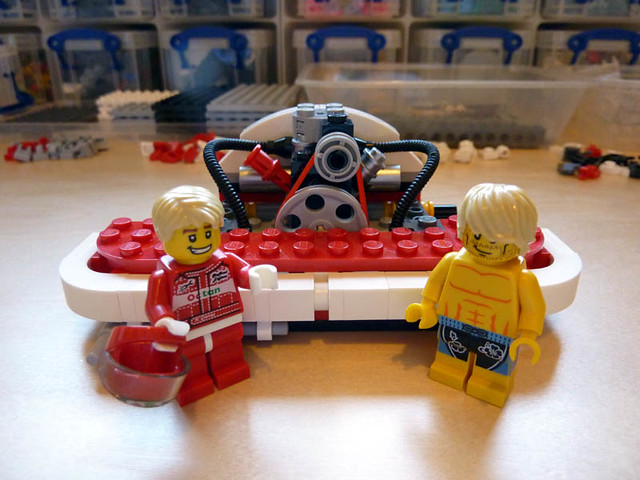
VM Camper 08 by bigospedros, on Flickr
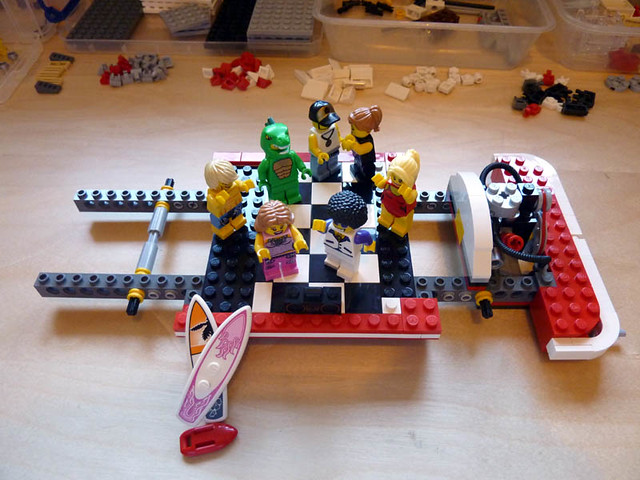
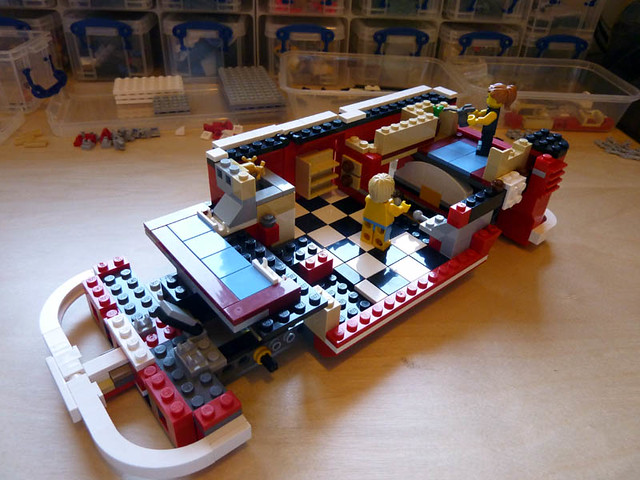
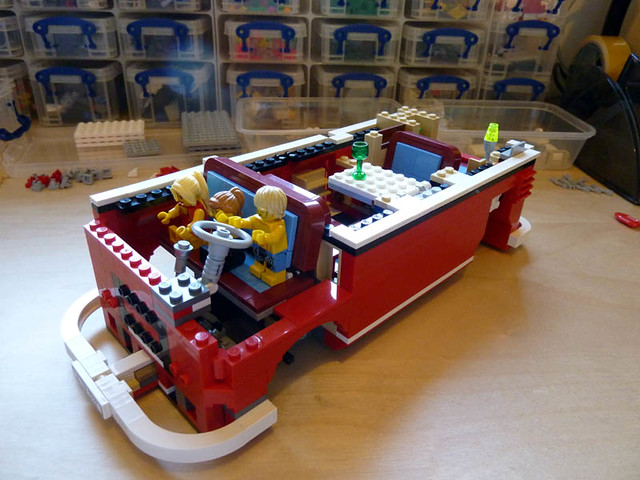
At this point in the build, the size of the model starts to take shape … including the addition of the black and white floor. Thus providing ample opportunity for the surfer dudes to organise a PAAARTAAY!
VM Camper 10 by bigospedros, on Flickr
Clearly someone didn’t read the invite though, since they turned up in fancy dress … tsk, students 😉
Party over and Brad and Debs help fit the engine cover, whilst Sal checks for safety …

VM Camper 11 by bigospedros, on Flickr
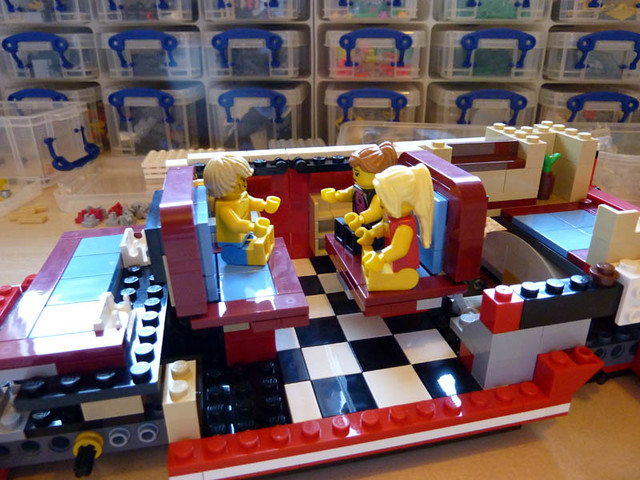
With the interior now starting to take shape, Brad and Deborah check out the facilities … including watering the “questionable plant”
VM Camper 13 by bigospedros, on Flickr
With the seats in, the chaps check out the space available …
VM Camper 14 by bigospedros, on Flickr
Including the folding down bed … nudge nudge, wink wink
VM Camper 15 by bigospedros, on Flickr
Brad, being the sharing type, then decides to test out the facilities with wine with Debs!
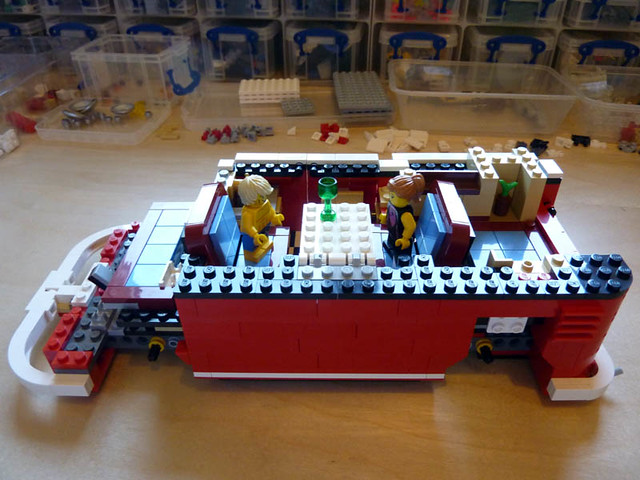
VM Camper 16 by bigospedros, on Flickr
With most of the main part of the back end built, we turn to the front of the van …
VM Camper 17 by bigospedros, on Flickr
and then the upper part, including the lovely curtains!

VM Camper 18 by bigospedros, on Flickr
When more detail was added to the interior, especially this cool surf art, there was a moment of worship …

VM Camper 19 by bigospedros, on Flickr
And the upper part is complete!
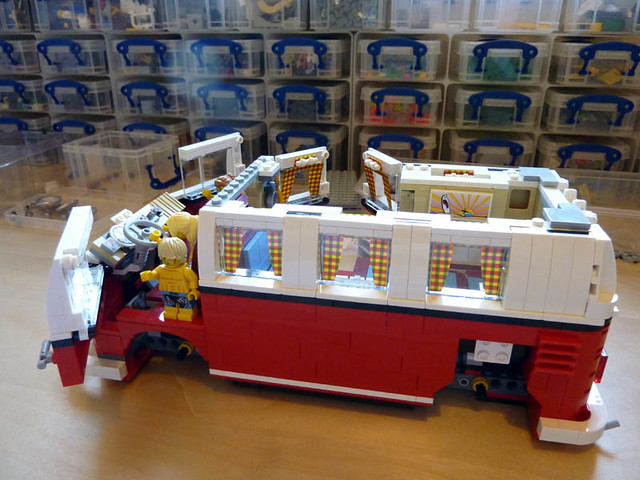
VM Camper 20 by bigospedros, on Flickr
Here we see the opening front windows … and here is where I have a minor complaint! That sticker, which shows the split in the window is pretty much unecessary … the model could happily exist without it. It wasn’t easy to apply to get central since you’re applying a clear sticker (mostly) onto a clear piece!
VM Camper 21 by bigospedros, on Flickr
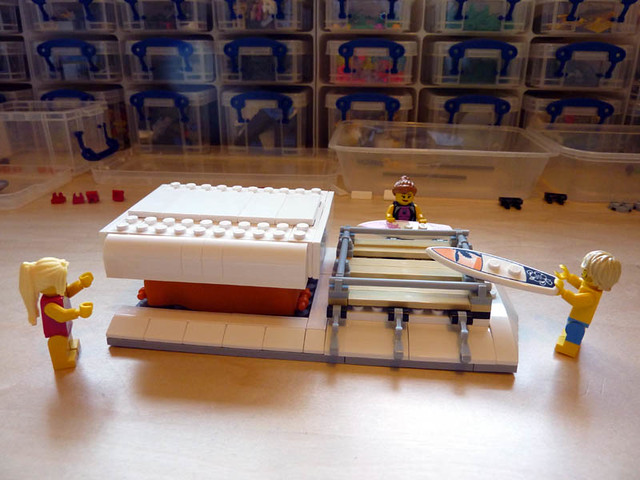
And now we move onto the roof … the extending roof mechanism is your basic scissor mechanism. Although my friendly little helpers just saw it as an excuse to practice their surfing!!!
VM Camper 22 by bigospedros, on Flickr
Now finished, the chaps were loading up …
VM Camper 23 by bigospedros, on Flickr
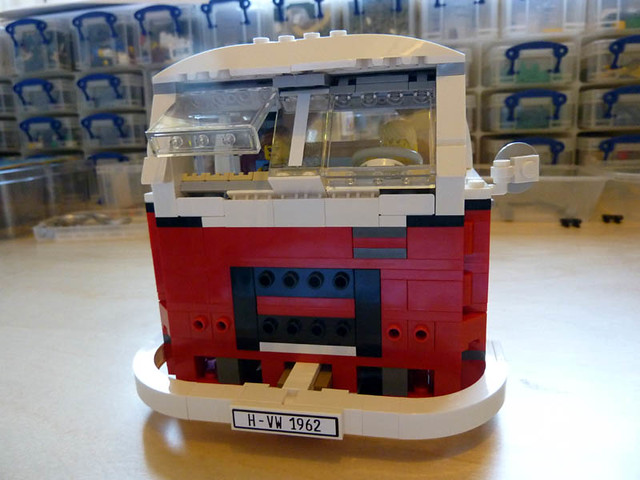
And here’s the roof installed …
VM Camper 24 by bigospedros, on Flickr
The penultimate part of the build is the front end … getting the VW sticker lined up right was a bit of a pain, I have to say. I was a bit worried about the black tubes from the photos, but it looks pretty decent in “the flesh”, as it were.
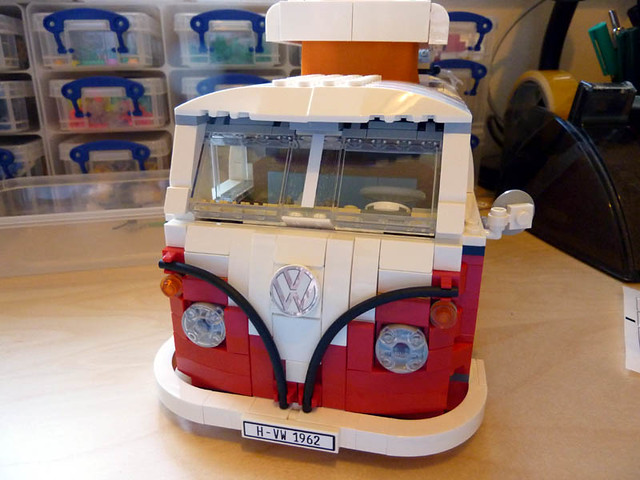
VM Camper 25 by bigospedros, on Flickr
VM Camper 26 by bigospedros, on Flickr
Obligatory spare parts photo
VM Camper 27 by bigospedros, on Flickr
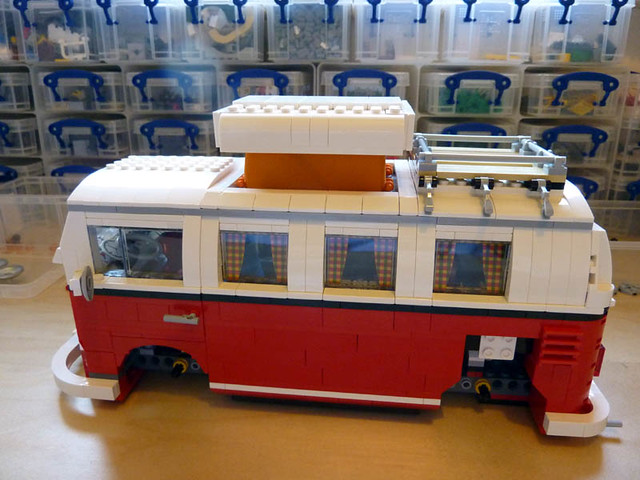
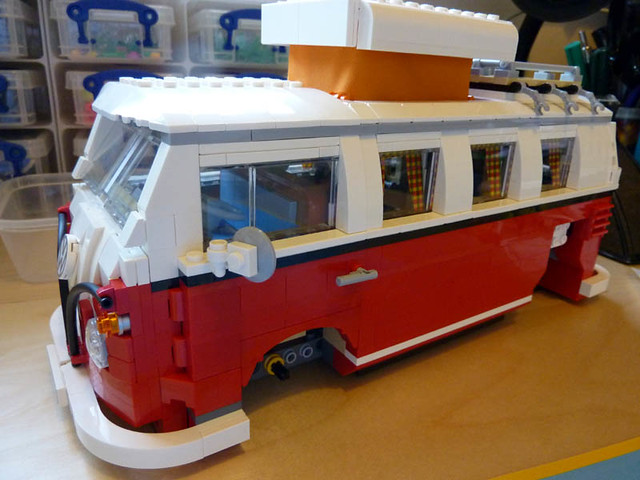
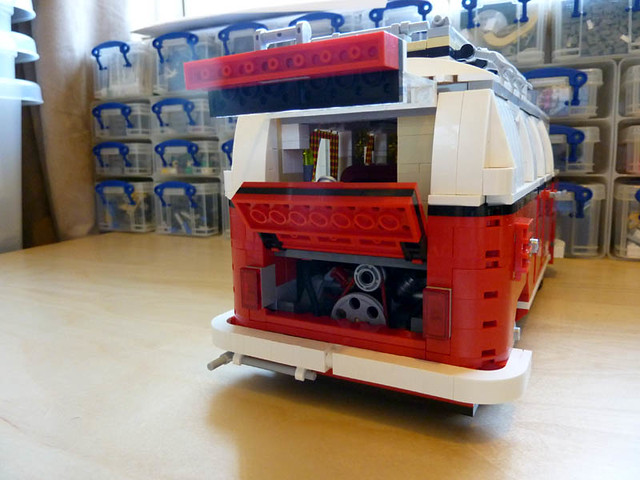
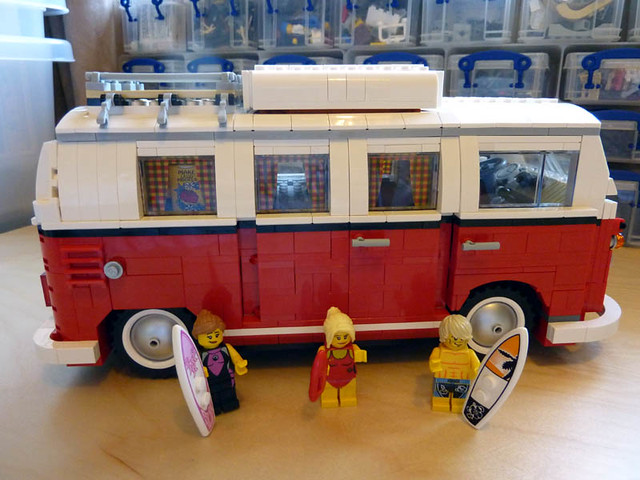
Completed build shots :
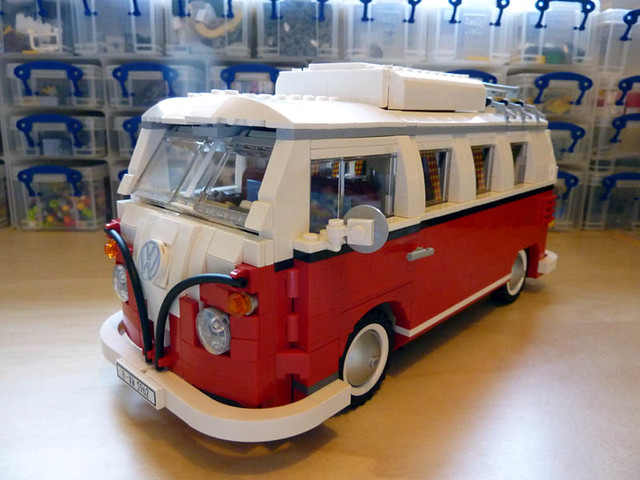
VM Camper 28 by bigospedros, on Flickr
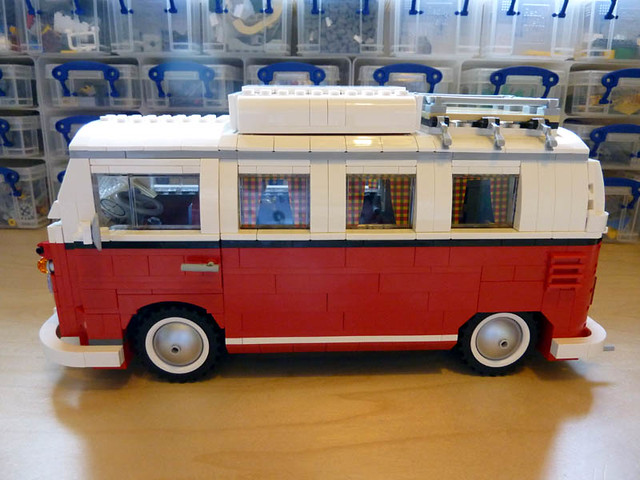
VM Camper 29 by bigospedros, on Flickr

VM Camper 30 by bigospedros, on Flickr

VM Camper 32 by bigospedros, on Flickr
(excuse the bit where the roof isn’t quite attached properly 😛 )
VM Camper 33 by bigospedros, on Flickr
VM Camper 34 by bigospedros, on Flickr
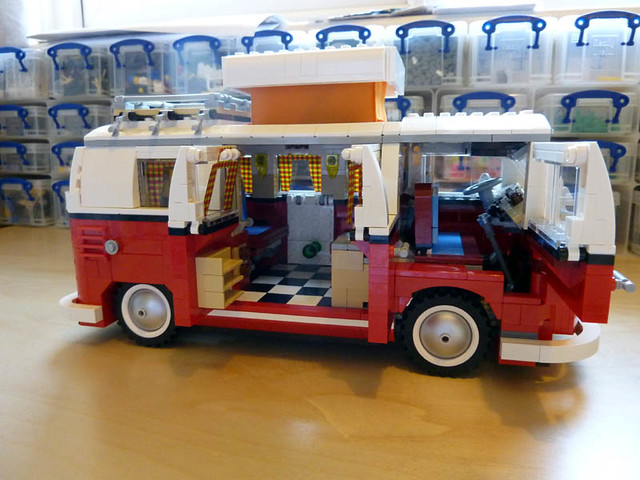
Interior shots
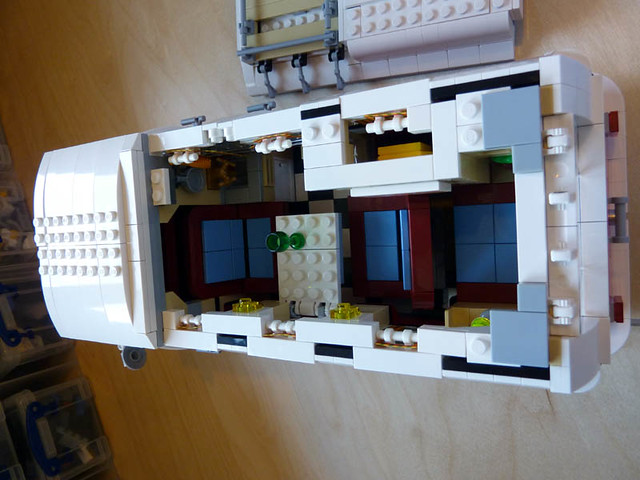
VM Camper 35 by bigospedros, on Flickr
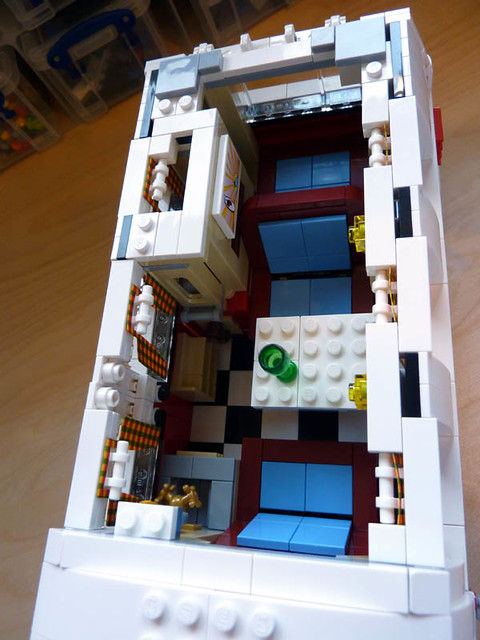
VM Camper 36 by bigospedros, on Flickr

VM Camper 38 by bigospedros, on Flickr
VM Camper 39 by bigospedros, on Flickr
Brad, Debs and Sally all thought it was rather cool, if a little big, for their needs!
What I liked
I loved all the little details of this model … the t-shirt, the art, the “questionable plant”, the whole interior … and the fact that they’d captured the shape of the vehicle very very well. There were some interesting building techniques along the way too.
What I didn’t like
I would’ve preferred some of the elements to be printed and as I said before, the stickers on the front and read windows were a bit of a pain. Especially the ones at the back were completely pointless, since they just added a small bit of white on the outer edges?! (see photo 30 for what I mean)
Other than that, I really can’t fault it. This set is going to be on display in my Lego room for a very long time! I’d recommend every gets this whilst they can 
Value: 10/10 (I thought this was a steal, even at full RRP, but my added bonuses and savings made it all the better)
Build Quality: 10/10
Accuracy: 8/10
Swoosh Factor: 7/10 (no steering means it can pretty much go forwards and backwards)
Play Features: 9/10
Minifigs: n/a
Final Score (Average): 9.2
Buy 10220 Volkswagen T1 Camper Van from LEGO Shop@Home!